Bob’s Ultimate Guide to winterizing your boat engine
Many Bob-fans have asked me how they should winterize their marine engine. Below you’ll find the result of my own experience (and a good amount of research ! 🙂 ).
Help me to make this list even better!
- Do you have questions about certain paragraphs ?
- Do you usually do certain tasks differently ?
- Do you do other things to winterize your engine ?
Let me know! Leave a comment at the bottom of the page or send me an email at meindert*at*boatcoachbob.com.
Oil system
Drain the oil or suck it out of the engine with an oil pump. Replace the oil filter and fill the engine with new oil.
Oil must be changed at the end of the season because there are acids and other substances in used oil that can damage the parts inside your engine. Not something you want going on during the entire winter, so it’s best to change the oil before the start of winter. Be sure to also change the oil in the transmission gearbox.
Start the engine, let it warm up a bit and put it in forward and reverse for a few seconds so the fresh oil can thoroughly spread throughout the entire engine. Recheck the oil level and top it off if necessary.
Fuel system
Check the fuel filter for water and pollution. Is there water or dirt (sludge) in the inspection glass of the filter? Then there might be a lot more water, diesel bacteria or dirt at the bottom of your tank, and that can be very bad for your engine. Drain the bottom layer of diesel from your tank (Hopefully you have a drain valve, if so; check to make sure it is situated at the lowest point of your tank). Otherwise you can pump a few liters of diesel fuel from the bottom of your tank with a hose (inserted through the fuel filler tube) that reaches the bottom of the tank. If there is also sludge (diesel bacteria) or water in this diesel fuel, then you can try to completely drain the lower part of fuel from your tank until you don’t encounter any more sludge or water. When you don’t find any more sludge or water and the diesel fuel is clear (not dark in color), you can normally sail on.
If however, your diesel fuel is dark in color, the only thing that can save you is draining and cleaning the entire fuel tank with a special product. If you encounter water/sludge it is always a good idea to replace your fuel filters, since chances are the sludge has also made its way into your filters. If you often have water in your diesel fuel, it is a good idea to check the air vent of your tank. Sometimes the vent outlet is installed in the hull in such a way that rainwater can easily get in, or strong waves can easily push water inside the vent.
Be sure to replace the primary and secondary filter of your engine’s fuel system every autumn. Bleed the air from the fuel system. Fill the tank completely to the top with diesel. Due to temperature differences inside and outside of the boat, condensation can form on the inside of the tank (on the topside). Part of the condensed water then sinks in and under the diesel fuel. Diesel bacteria really like hanging out in between the water (at the bottom) and the diesel (above the water), and that is not a good thing.
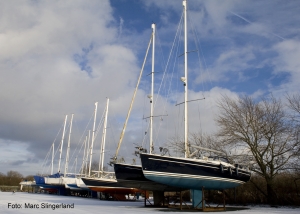
Now is a good time to haul the boat out of the water.
Saildrive
For engines with a Saildrive: replace the oil in the saildrive leg when the boat is on shore.
Cooling system
Water can freeze, thus expanding and damaging parts of your engine in the process. For directly cooled engines (in which seawater cools the entire engine through water channels running through the engine) this poses a bigger risk than for indirectly cooled engines (where seawater cools coolant which in turn runs through the entire engine).
If you have an indirectly cooled engine, you have to make sure the coolant in your engine can’t freeze. You’ll need to check whether the coolant still protects your engine sufficiently from frost (this is only the case with indirectly cooled engines of course). You can perform this check with a simple tool called a hydrometer (for sale at car part shops). If the coolant does not offer enough protection against frost you can fill it up or drain all of the the coolant and replace it with new coolant.
As for the raw water system, it is best to start out by rinsing the entire raw water system with fresh water: open the raw water valve, disconnect the raw water hose and dip it in a bucket of fresh water. Start your engine and let it run until the bucket is empty. Now you can protect your raw water system against frost. There are two options.
- Filling the raw water system with antifreeze: dip the disconnected raw water hose in a bucket with a mixture of water and antifreeze. Preferably don’t use antifreeze with ethylene glycol (the substance that is usually found in antifreeze), because this is very harmful to the environment. It is usually hard to intercept the antifreeze that comes out of your exhaust during the first engine start in spring . So every spring a lot of toxic antifreeze gets poured into our waters. Instead, use antifreeze based on propylene glycol, which is not toxic and is also used for the frost protection of drinking water systems on board.
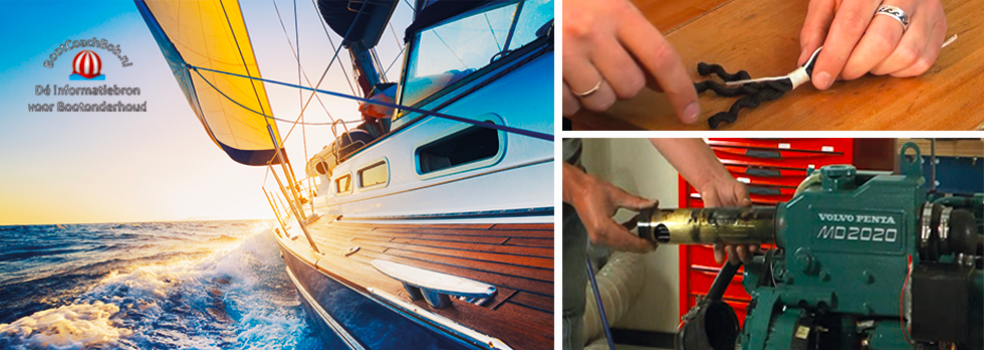
- A second option is simply draining the raw water system. This entails draining all raw water canals in the engine. Be sure to also drain the lowest parts of the engine. Then you remove the impeller. Lubricate the impeller with waterproof grease (e.g. Vaseline) and put it back. Then lightly screw on the pump cover (don’t screw it back tightly) to prevent the impeller from getting stuck during the winter. An alternative is to keep the impeller inside a sealed plastic bag. Have the engine running for a few seconds to blow remaining water out of the outlet hose. If you have an exhaust with a water-noise damper or a waterlock, you’ll have to suck the remaining water out of the exhaust with a small pump.
Raw water filter (or raw water strainer)
Clean the raw water filter (or ‘strainer’): unscrew the filter cover from the filter and clean the filter insert with water or if necessary with a mild detergent solution (preferably a biodegradable detergent, like Ecover). Also check the rubber gasket of the filter for cracks and other damage, replace it if necessary and lubricate it with waterproof grease (eg. Vaseline) before you reassemble the filter.
Cleaning of engine exterior
Check the exterior of the engine for remains dirt/oil/diesel. Be sure to also check the joints where different parts of the engine are mounted onto each other together (eg. where the heat exchanger is mounted onto the rest of the engine). If you see small (old) oil leaks or a whitish residue (salt crystals) in certain places, this can be a sign that a gasket has decayed, so that oil or water can leak from the engine. Depending on where the gasket is located you should replace the gasket if you can do it yourself or have the engine checked by a mechanic.
Rust protection
Check the control cables of the engine for damage and rust (sometimes visible if the cable sleeve is a bit swollen). Replace the cable if necessary and grease the metal parts of the cables, e.g. with WD40. Spray the alternator and the starter lightly with WD40 to counteract moisture (and to lubricate the alternator). You can also do this with the other electrical components on the engine (cables, connectors …) to counteract moisture.
Greasing
If your engine has grease points, grease ‘em ! Check your manual for the specific grease points on your engine.
Battery
Make sure the battery/batteries are fully charged. A battery can discharge itself in a few months and a discharged battery can freeze and get damaged in the process. Recharge the battery fully at least once a month, or install a trickle charger. A small solar panel or small wind generator is also well suited for this purpose. You could also disconnect the battery from the rest of your electrical system to minimize discharging during the winter.
Hoses and rubber parts
Check hoses for damage: soft spots, holes, cracks … Also check underneath the hose clamps: unscrew them a little so you can move them over a bit and you can inspect the hose. And while you’re at it, why not also check the hose clamps themselves for wear. Don’t forget to screw them back on tightly once you’re done. Check all rubber parts of the engine for wear and weak spots. Your rubber engine mounts for example can degenerate by diesel that has been spilled onto them.
Antisiphon Valve
Check if the antisiphon valve is still working properly. In the case of an antisiphon valve with a rubber valve, you can wash the valve with warm water (or a solution of water and a mild detergent). In doing this you wash off the salt , that can otherwise cause the valve to get stuck, thus rendering the antisiphon valve useless. Rinse and dry well and reassemble.
Propeller
Remove the propeller. Grease the propeller shaft (or the small shaft on your saildrive leg) with waterproof grease (eg Vaseline). Check the propeller for wear. If the propeller is corroded, there might be a problem with the anodes on the bottom of the hull, or something else causing galvanic corrosion. If you have a folding prop, disassemble it, degrease it (e.g. with brake cleaner), grease it back up and store it in a dry place. Check the rubber seal between the propeller and the shaft or saildrive for wear.
Openings to the inside of the engine
Plug the openings to the inside of the engine (air intake, exhaust, fuel tank vent), for example with a piece of cloth. This way you avoid ending up with unwanted visitors (spiders, moths) and dirt in your engine. Finally you can cover the engine with a tarp or a thick piece of plastic sheet, so that if there might be leak someplace in your boat just above the engine, water won’t seep onto the engine itself.
Last but not least: people forget more than they think…
Make sure you leave clear notes for yourself (e.g. on a sheet of paper on your chart table) with the things on it that you need to do before you start your engine back up in the summer (e.g. putting the impeller back, opening up the air intake back again, …).
I wish you the best of luck winterizing your boat ! Don’t forget to share this article & leave a comment below!